You can click on the next link to download this guidebook.
To create a course, you will need to login first
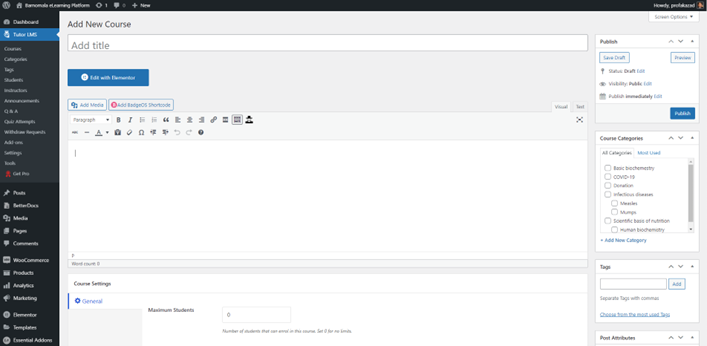
Add a new course
- Give a title to your course in Add title box.
- Click on Publish (see on right side). Once published, the Publish button will change to Update. So. In the next time, whenever you will make some change, save the new change by clicking on Update button.
- You can write something in the text editor bx down the Course title field. Click on update.
- See the Course Categories box on right side. Select one or more course categories. If you don’t course category relevant to your course, you can click on +Add New Category and press enter.
- You will also see a Parent category box below where you can select a parent category of your course.
- You will find a Tags field below the Category Box. You can type few key words in this box and click on Add. You can add more than one tag here.
Setting the course
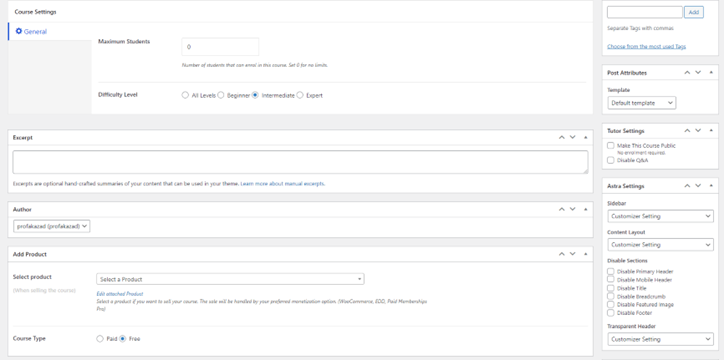
- Now see the Course Settings.
- If you want to keep students’ number unlimited then keep the zero figure there. Otherwise, type the number which you desire.
- Select the difficulty level of students.
- If you like to add an excerpt of your course, type in the Excerpt box. Otherwise, leave it blank.
- Go to Curse Type. Select Paid or Free.
- On the right side, in the Template box, you can select Elementor Full Width.
- Click on Update button to save your change.
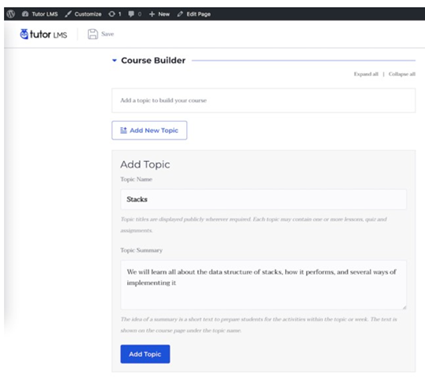
Course Builder
- Go to Course builder section. Add Topic to your course. Topics are Chapters of your course book. Click on Add New Topic. Type the topic name and click on Add Topic. Add a small topic summary about its content. You can add as many topics as you require. Remember, Topic names are just chapter names. We did not content yet.

- On right side of the Course builder section, there is a Featured Image Box. Select here to add a featured image that will better represent your course. Click on the Set featured image button. You will find the media library. Select if you find something in the media library. If not upload from your computer. You can search appropriate image in google and save it to your computer which you can add to media library. An image selected from the media library will need to click on the Insert image button to add to your course.
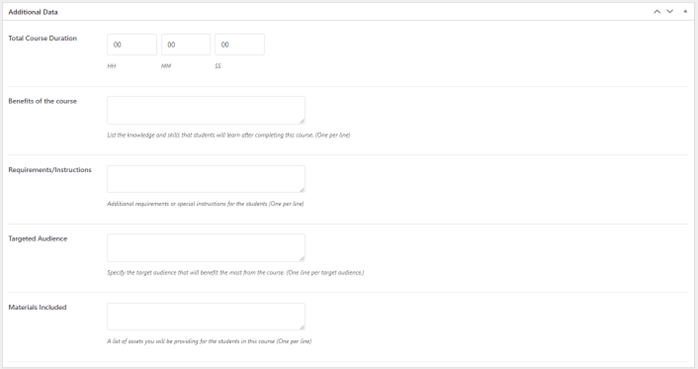
- Below the Course builder section, you will see an Additional Data section to enter Total Course Duration, Benefits of the course, Requirements/Instructions, Target Audience, and Materials Included fields. At the bottom of each field, there is description which explains what you will type in the field and how.

- Below these fields, you will find a Video section. Select a video source, YouTube player. Then there will be a video url box. Go to YouTube. Find an appropriate short duration video maximum 5 to 6 minutes, copy the url and paste it in this box.
- Frequently click on Update button to save the changes.
Lesson
- You have created Topics but not contents in each topic. The topics are called Lessons.

- Click on the name of any topic to expand. You will find two buttons. Lesson and Quiz. Click on Lesson. Create as many lessons as you need to complete contents of your Topic or Chapter.
- Click on each lesson one by one and add content in the lesson.
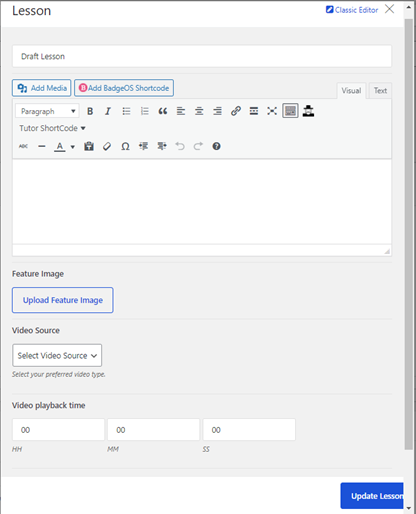
- The above is a lesson editor box. Give a lesson title.
- Type content in the editor box. You can add media by clicking on Add Media button (image, audio, video, file).
- Upload a Feature Image for the lesson.
- If you like to add a video (good idea), select video source as YouTube Player and then paste the link in url box.
- If you scroll down, you will see an Upload Attachment button. If you wish for adding any attachment, MS Word, MS Excel, PowerPoint, PDF file, you can do that here. However, unless necessary it is not a good idea to attach file.

Quiz Builder
- The quiz builder helps you create interactive and innovative materials for students.
- To get started, from the course builder (both frontend and backend), navigate into a topic and then click on the “Quiz” button.
- Then, give the quiz a name and a short description to let students know what this quiz is about.
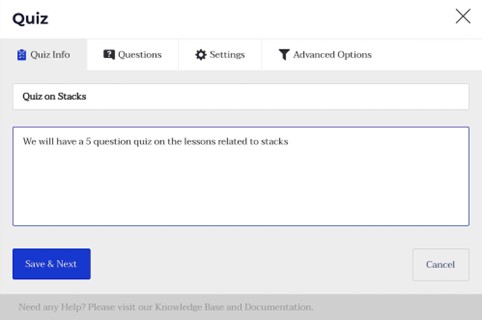
- After that, you can start adding questions to the quiz one by one. Let’s start by adding one of the most basic styles of questions: The Single Choice question.
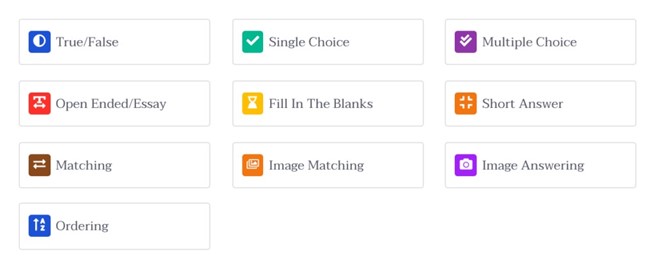
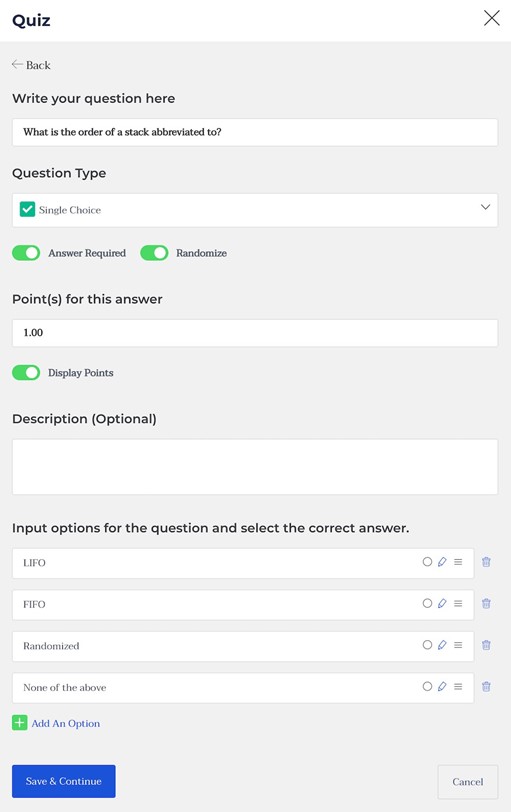
Add the question, select the type from the dropdown, and a description if you want. There are a few settings for each question that you need to understand to make the best use of it:
Answer Required: Mark this as yes if you want this question to be mandatory to answer
Randomize: Mark as yes if you want the question’s order to be randomized among the list of questions.
Points for this answer: Use this field to change the points to be awarded for getting this question right
Display points: Enable this if you want to display the points on the quiz field
Add a few relevant answers and from them, select the correct answer. Make sure that there is only one obvious answer as this is a single choice question. Then, click save and continue to keep adding more.
After adding all needed questions, you can head to the settings to customize the quiz behavior.
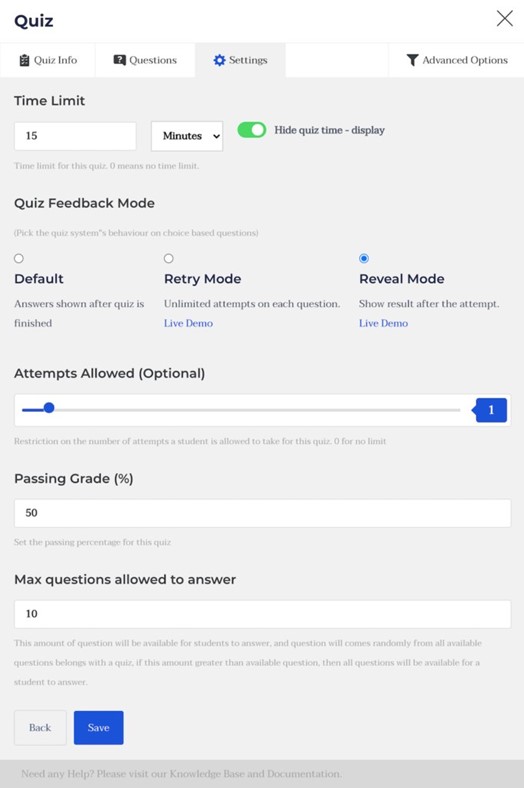
Time Limit: Add a time limit to the quiz
Hide Quiz Time Display: Enable this to hide the quiz timer
Quiz Feedback Mode: Decide how you want to provide your students with feedback after they are done taking the quiz. The tooltips describe what each mode means.
Attempts Allowed: Specify how many times each student can take and retake the quiz before it is hidden from them.
Passing Grade: Specify the passing grade for this quiz.
Max questions allowed to answered: This one’s a bit tricky. This feature is introduced to randomize questions in a quiz. The purpose of this function would be clearer with an example. Say you have 50 questions in a quiz, if you put 50 here, a student will have to answer all the 50 questions in order to complete the quiz. But if you put 10 here, the student will have to answer only 10 questions out of the 50 and these 10 questions will appear randomly. No student will get the same set of questions.
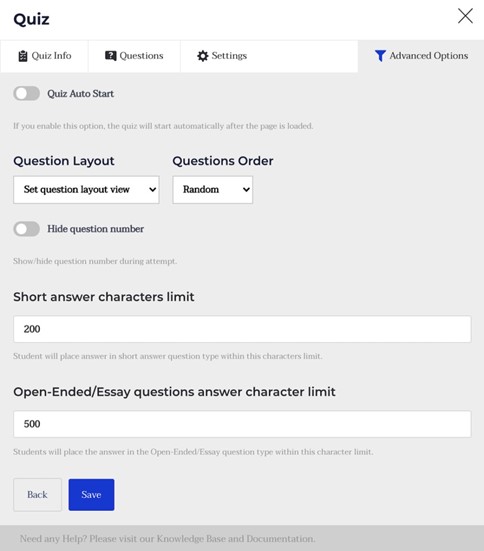
Quiz Auto Start: Enable this to make the quiz start immediately after the page is loaded
Question Layout: Set the layout for the quiz page.
Question Order: Select the order for the questions provided to you.
Hide question number: Select to hide the question number during the quiz
Short answer character limit: Select the character limit for short answers
Open-ended/Essay questions answer character limit: Select the character limit for short answers.

